Ready to elevate your steak game but overwhelmed by the idea of dry aging beef at home? After all, it can seem daunting with all those factors like humidity control and bacteria growth.
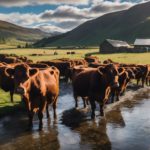
Sure thing – I’ve been there too! Did you know that back in the 17th century, dry aging was a common way to preserve meat and enhance its flavor?.
Packed with countless hours of research, this blog post will guide you through mastering the art of preparing flavorful, restaurant-quality dry aged beef right from your kitchen. Ready for succulent steaks that melt in your mouth? Let’s dive into the world of at-home meat aging!
Key Takeaways
- Dry aging is a process that enhances the flavor, tenderness, and juiciness of beef by exposing it to controlled humidity and temperature for an extended period of time.
- Trimming excess fat and silver skin from ribeye steaks before dry aging helps improve the overall quality and taste of the meat.
- To create an ideal environment for dry aging at home, you need to control factors like temperature (between 34°F and 38°F) and humidity (70% to 85%).
- The recommended time frames for dry aging different cuts of beef can vary, but generally range from 21 to 45 days.
What is Dry Aging?
Dry aging is a process in which beef is exposed to controlled humidity and temperature for an extended period of time, allowing natural enzymes within the meat to break down muscle fibers and enhance flavor.
Definition of Dry Aging
Dry aging is a unique way to make beef taste better. Think of it as a meat spa! It is when you let raw steak sit in a cool, controlled place for weeks. In this time, the meat loses water.
This makes the flavor stronger and helps the steak become tender. So, dry aging transforms normal beef into top notch food that melts in your mouth!
Benefits of Dry Aging
Dry aging beef has numerous benefits that meat lovers can enjoy. Here are some of the advantages:
- Enhanced flavor: Dry aging allows the natural enzymes in the meat to break down proteins, resulting in a more concentrated flavor profile.
- Improved tenderness: The aging process helps to tenderize the meat and make it more melt-in-your-mouth delicious.
- Increased juiciness: During dry aging, moisture evaporates from the meat, which leads to a more concentrated and rich taste.
- Concentrated aroma: The longer beef is aged, the deeper and more complex its aroma becomes, adding depth to every bite.
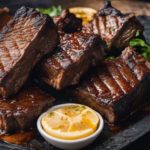
- Unique texture: Dry-aged steaks have a firmer texture on the outside while being incredibly tender on the inside, providing a delightful mouthfeel.
- Greater caramelization: When cooked, dry-aged steaks develop an intense crust due to the higher sugar content that forms during aging.
- Higher quality beef: Dry aging is generally done with high-quality cuts of meat, ensuring you’re starting with premium beef for your culinary creations.
How does the aging process affect the meat?
Dry aging is a process that affects the meat in a few different ways. First, it allows enzymes to break down some of the proteins and connective tissues in the meat, which makes it more tender.
This also enhances the flavor because as the beef ages, it develops rich and complex flavors. Additionally, during dry aging, moisture evaporates from the meat which further concentrates its flavor.
However, it’s important to note that this loss of moisture can cause some shrinkage in size. But don’t worry, this doesn’t mean you’re losing out on quality – instead, you’re getting a more flavorful and tender steak!
Preparing the Ribeye Steak for Dry Aging
To prepare the ribeye steak for dry aging, start by selecting a high-quality cut of meat and trimming off any excess fat and silver skin. Then, season the steak with your favorite spices to enhance its flavor.
Selecting the Right Cut of Meat
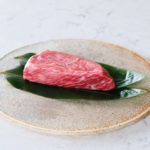
When it comes to dry aging beef, selecting the right cut of meat is crucial. Look for high-quality cuts like USDA Grade Prime ribeye steak, which has a good amount of marbling. The marbling is important because it adds flavor and tenderness to the meat during the aging process.
Avoid low-grade cuts as they might become overly dehydrated when dry-aged. Remember that the quality of your meat will directly affect the final taste and texture of your dry-aged steak, so choose wisely.
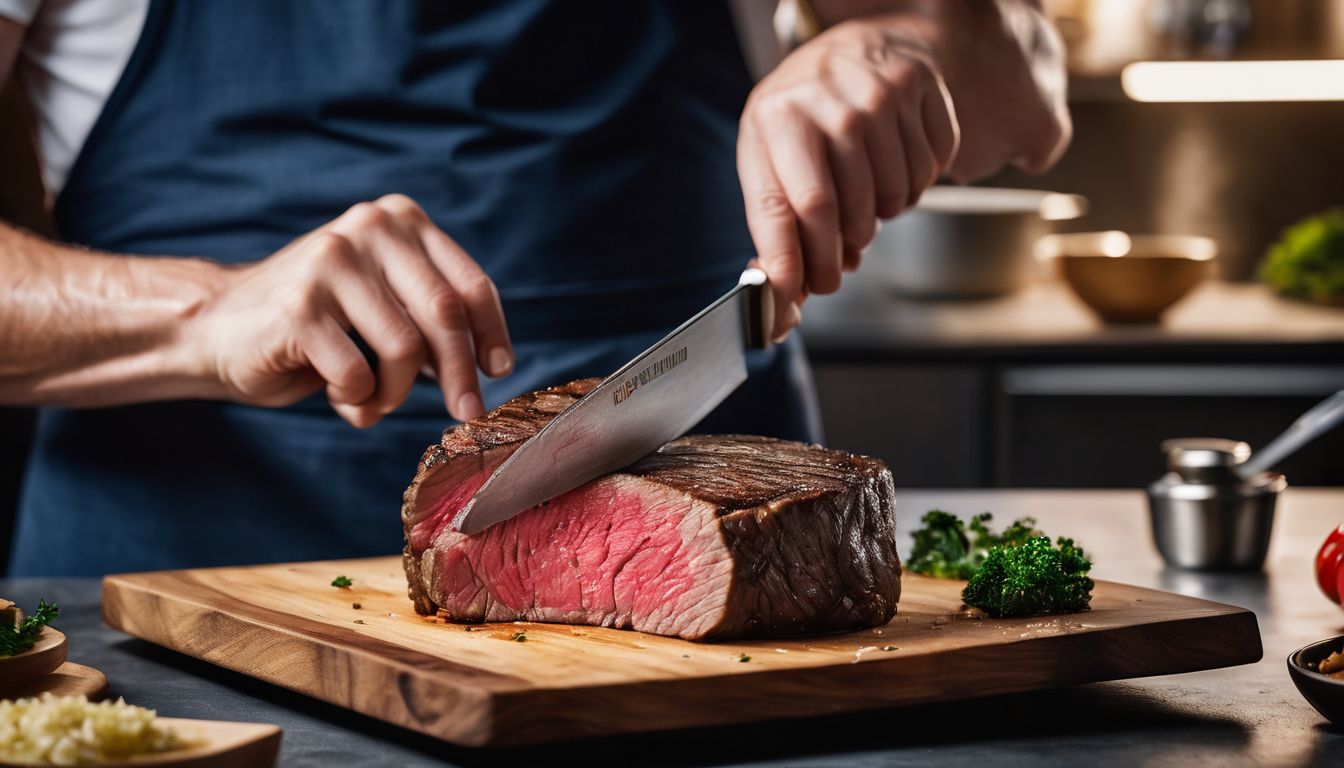
Trimming the Fat and Silver Skin
When preparing a dry-aged ribeye steak, it’s important to trim off the excess fat and silver skin before aging. This helps ensure that you’re left with only the best part of the meat for optimal flavor and tenderness. Here are some key steps to follow when trimming your steak:
- Start by examining the ribeye closely and identify any thick layers of fat on the edges. Use a sharp knife to carefully remove these fat deposits, being mindful not to cut into the actual meat.
- Next, locate any strips of silver skin running along the surface of the steak. Silver skin is tough and chewy when cooked, so it’s important to remove it. Work your knife underneath the silver skin and gently pull it away from the meat, using short strokes to avoid wasting any of the good meat.
- Once you’ve removed the fat and silver skin, take a moment to inspect your trimmed ribeye steak for any remaining connective tissue or gristle. Trim away any additional areas that appear less desirable, ensuring that you have a clean piece of meat ready for aging.
Seasoning the Steak
To make the perfect dry-aged steak, seasoning is an important step. Here are some tips for seasoning your steak:
- Choose the right seasoning: Use a mix of salt and pepper as a basic seasoning for your dry-aged steak. You can also add other spices and herbs to enhance the flavor.
- Season generously: Don’t be shy when it comes to seasoning your steak. Make sure to season both sides of the steak evenly with enough salt and pepper.
- Let it sit: After seasoning, let your steak sit at room temperature for about 30 minutes. This allows the flavors to penetrate the meat and helps to ensure even cooking.
- Patience is key: When dry-aging beef, it’s important to let the flavor develop over time. So be patient and let the seasoning work its magic during the aging process.
- Consider marinating: If you want to add more flavor to your dry-aged steak, you can marinate it before cooking. Choose a marinade that complements the natural flavors of beef.
Setting Up Your Dry Aging Space
Creating the perfect environment is crucial for dry aging beef at home. You’ll need to control factors like temperature and humidity to ensure the best results. Keep reading to learn how to set up your own dry aging space and achieve that melt-in-your-mouth flavor you’ve been craving.
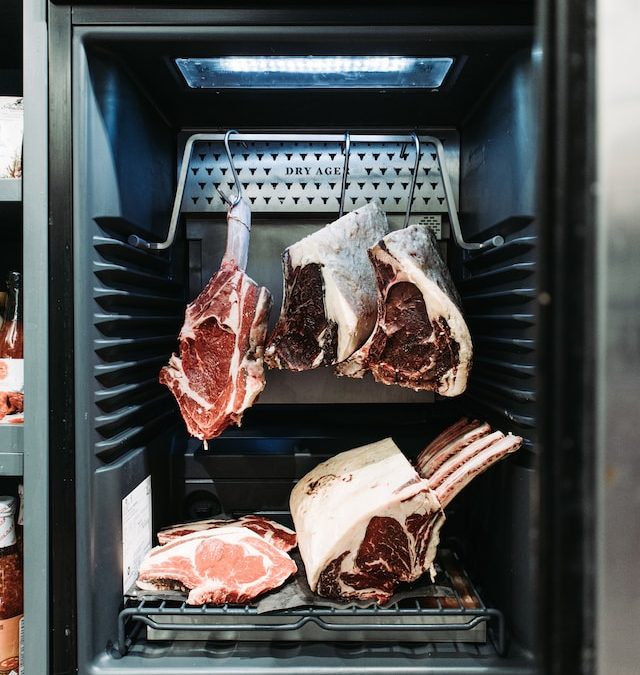
Creating the Ideal Environment
To create the perfect environment for dry aging beef at home, you’ll need to follow these steps:
- Find a dedicated space: Choose a well-ventilated area in your refrigerator or invest in a specialized dry-aging fridge.
- Control the temperature: The ideal temperature for dry aging is between 34°F and 38°F (1°C and 3°C). This helps slow down bacterial growth while allowing enzymes to break down the meat.
- Maintain proper humidity: Aim for a humidity range of 70% to 85%. This helps prevent the meat from drying out too quickly or developing mold.
- Use a fan: Air circulation is important to prevent moisture buildup and control bacteria growth. Use a small fan in your dry aging space if needed.
- Keep it odor-free: Make sure the area around your dry-aged meat is clean and free from strong odors that could affect the flavor of your steak.
Recommended Time Frames for Different Cuts of Beef
As a meat lover and dry aging enthusiast, it’s crucial to have an idea of the recommended time frames for aging different cuts of beef to achieve that intense, earthy flavor we all chase. Remember, dry-aging is a delicate process that requires time, space, and quality meat. The higher the quality of your beef, the better the result. Here’s a handy table to help you out:
| Cut of Beef | Recommended Aging Time |
|---|---|
| Ribeye | 25-30 days |
| Striploin | 30-35 days |
| T-Bone | 25-30 days |
| Top Sirloin | 21-28 days |
| Short Loin | 25-30 days |
| Brisket | 30-45 days |
This table should serve as a guide to dry aging. Please note that these are estimates and the optimal aging duration may vary depending on the specific characteristics of the cut, like its marbling and the grade of the meat. It’s always best to start on the lower end of the time range and work your way up until you find an aging duration that hits the sweet spot for your palate.
Finishing Touches: Wrapping and Storing Your Aged Ribeye Steak
After patiently waiting for your ribeye steak to dry age, it’s time to give it the finishing touches before enjoying its deliciousness. Here are the important steps to wrap and store your aged ribeye steak:
- Use cheesecloth: Gently wrap your dry-aged ribeye steak with a layer of cheesecloth. This breathable fabric helps protect the meat while allowing air circulation.
- Double-wrap for extra protection: To ensure maximum freshness and prevent any unwanted odors from seeping into your steak, double-wrap it with a second layer of cheesecloth.
- Store on a wire rack: Place your wrapped ribeye steak on a wire rack in the refrigerator. The rack allows air to circulate around the meat, further aiding in drying and preventing moisture buildup.
- Check regularly: Keep an eye on your aged ribeye steak during storage. If you notice any excessive moisture or unpleasant odors, unwrap it and inspect for spoilage. Proper dry aging should result in a beautifully marbled and aromatic piece of meat.
- Consider aging bags: Alternatively, you can use specially designed aging bags instead of cheesecloth for wrapping your ribeye steak. These bags provide added protection and are convenient for those new to home dry aging.
The Art of Patience: How Long to Age Your Ribeye Steak?
Determining the ideal length of time to age your ribeye steak depends on several factors, including personal preference and the cut of beef you are working with.
Factors That Affect the Length of Time Needed for Proper Aging
The length of time needed for proper aging of your ribeye steak can be influenced by several factors. The first factor is the type of cut you have selected. Different cuts require different amounts of time to reach optimal flavor and tenderness.
Another factor is the temperature and humidity in which you are aging your steak. Maintaining the ideal conditions will ensure that the meat ages properly without spoiling. Additionally, the quality of the meat itself plays a role in determining how long it needs to age.
High-quality, well-marbled beef typically requires less aging time compared to lower-grade cuts. Lastly, personal preference also comes into play as some people prefer a more aged taste while others may prefer a shorter aging period for a milder flavor.
Recommended Time Frames for Different Cuts of Beef
For the best results in dry aging different cuts of beef, it’s important to follow the recommended time frames. The length of time may vary depending on the cut of meat and personal preference. Generally, larger cuts like ribeye and strip loin need around 30 to 45 days of aging for optimal flavor and tenderness. On the other hand, smaller cuts like sirloin or tenderloin usually require a shorter period, about 14 to 21 days. It’s worth noting that these are just guidelines, and some people prefer longer or shorter aging times based on their taste preferences. To ensure success, it’s crucial to monitor the conditions carefully during the entire process.
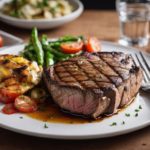
Cooking and Enjoying Your Dry Aged Steak
Cooking your dry aged steak to perfection is essential in order to fully enjoy the flavor and tenderness that comes from the aging process.
Best Cooking Methods for Dry Aged Meat
Cooking a perfectly dry-aged steak requires the right techniques. Here are some of the best cooking methods to bring out the flavors and tenderness of your dry-aged meat:
- Searing: Start by preheating your pan or grill to high heat. Then, sear the steak for a few minutes on each side. This will help caramelize the surface, creating a delicious crust.
- Slow Roasting: For thicker cuts of dry-aged beef, slow roasting is ideal. Place the steak in a preheated oven at a low temperature (around 250°F) and cook until it reaches your desired level of doneness.
- Sous Vide: This method involves vacuum-sealing your steak and cooking it in a water bath at a precise temperature. It allows for even cooking and retains moisture in the meat.
- Grilling: If you prefer the smoky flavor from grilling, opt for this method. Make sure to preheat your grill to high heat and cook your dry-aged steak over direct heat for a short period, then finish with indirect heat to achieve the desired doneness.
- Reverse Searing: This technique involves cooking the steak at a low temperature first, then finishing it with a quick sear at high heat. It helps ensure an even cook throughout the meat while also giving it a nice crust.
Tips for Achieving the Perfect Cooked Steak
Achieving the perfect cooked steak is an art. Here are some tips to help you master it:
- Start with a high-quality, well-marbled steak. Remember, the better the quality of the meat, the tastier and more tender your steak will be.
- Let your steak come to room temperature before cooking. This helps it cook more evenly.
- Use a hot grill or skillet to sear the steak quickly and create a delicious caramelized crust on the surface.
- Flip your steak only once during cooking to retain its juiciness and avoid overcooking.
- Use a meat thermometer to ensure that your steak reaches the desired internal temperature. For medium-rare, aim for around 135°F (57°C).
- After cooking, let your steak rest for a few minutes before slicing or serving. This allows the juices to redistribute and keeps your steak moist and flavorful.
- Season your cooked steak with salt and pepper or other desired seasonings to enhance its flavors.
- Pair your perfectly cooked steak with complementary side dishes like roasted vegetables or creamy mashed potatoes for a complete meal.
Serving and Pairing Recommendations
When it comes to serving and pairing your perfectly dry-aged steak, here are some delicious recommendations:
- Let the steak rest: Allow your steak to rest for a few minutes after cooking. This helps the juices redistribute and ensures a juicy, tender bite.
- Simple seasonings: Dry-aged steaks have incredible flavor on their own, so keep the seasonings simple. Just a sprinkle of salt and pepper can enhance the natural taste of the meat.
- Side dishes: Serve your dry-aged steak with classic accompaniments like mashed potatoes, roasted vegetables, or even a fresh salad. These sides complement the richness of the meat without overpowering its flavor.
- Red wine pairing: A dry-aged steak pairs beautifully with a full-bodied red wine, such as Cabernet Sauvignon or Malbec. The tannins in these wines help cut through the richness of the meat and enhance its flavors.
- Grilled vegetables: Consider grilling some fresh vegetables alongside your steak for a flavorful and healthy side dish. The smoky char from the grill perfectly complements the rich, savory flavors of the dry-aged beef.
- Compound butter: Elevate your dry-aged steak by adding a pat of flavored butter on top before serving. Garlic herb butter or truffle butter adds an extra layer of decadence and enhances the overall taste experience.
- Don’t forget dessert: Finish off your meal with a sweet treat that complements the richness of your dry-aged steak. A classic chocolate lava cake or a creamy cheesecake can be the perfect ending to a memorable dining experience.
Conclusion
Mastering the perfect dry aged beef at home requires time, patience, and high-quality meat. By properly preparing your ribeye steak, setting up the ideal aging space, and understanding how long to age your steak, you can achieve a tender and flavorful masterpiece.
With the right cooking methods and serving recommendations, you’ll be able to enjoy a delicious dry-aged steak that will impress any meat lover. So go ahead, embark on this culinary adventure and savor the results of your hard work!
FAQs
1. How long does it take to dry age beef at home?
Dry aging beef at home typically takes around 2-4 weeks, depending on the desired level of flavor and tenderness.
2. What is the benefit of dry aging beef at home?
Dry aging beef at home enhances its flavor and tenderness by allowing natural enzymes to break down muscle fibers, resulting in a more intense and complex taste.
3. Do I need any special equipment to dry age beef at home?
Yes, you will need a dedicated refrigerator or a specialized dry-aging bag that allows air circulation while preventing contamination from other foods.
4. Can I dry age any cut of beef at home?
While most cuts can be dry-aged, it’s recommended to use larger cuts with more fat content for better results, such as ribeye or striploin steaks.
Greetings!
With over two decades of diverse experience in the meat industry, I proudly stand as an expert in all things meat. My journey commenced with a strong foundation in hospitality, where I honed my culinary skills as a chef in prestigious restaurants and on luxurious superyachts worldwide.
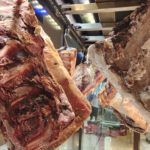
However, my true passion lies in the art of butchery. Throughout my extensive career, I have had the privilege of working with renowned meat purveyors and mastering the craft of meat cutting and preparation. From breaking down whole carcasses to meticulously selecting prime cuts, my butchery expertise is at the core of my meat knowledge.
Having immersed myself in various cultures and cuisines, I have honed my skills to deliver exceptional dining experiences, crafting delectable dishes that celebrate the natural flavors of different meats. Whether it's sourcing the finest meats for discerning clients or sharing valuable tips on meat selection and cooking, I take pride in elevating the meat experience for both professionals and enthusiasts.
My journey has taken me from the bustling kitchens of top-rated restaurants to the heart of meat processing facilities, gaining insights and honing my skills to become a true meat connoisseur. Now, I am enthusiastic about sharing my expertise, offering valuable insights on meat selection, cooking techniques, and the art of butchery.